Note: CPU mining is extrememly inefficient I was mining an an 8 core machine for 3 days and didn’t mine a block, but it is chance based so your results may vary. Either get a machine with a GPU, or think about purchasing mining power from a provider.
See my previous blog post about how I purchased mining contracts from a dedicated provider.
If you have an Azure account and want to experiment with spinning up a VM to do some CPU mining, here are the instructions to go through. It is made complicated due to the Ubuntu VM images only creating disks of 30GB which isn’t large enough to hold the Ethereum blockchain.
There are 4 major steps:
- Prestep – Prepare a wallet to mine into.
- Create a new Ubuntu VM on Azure.
- Configure a 2nd hard drive.
Move /home to the new hard drive.
- Install and run geth.
Prestep – Prepare a wallet to mine into
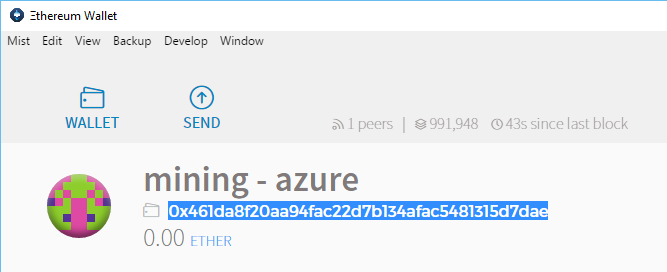
It is more convenient to have your miner send any mined Eth to a central wallet that you control. The easiest way is to use the desktop Mist wallet
- Download Mist https://github.com/ethereum/mist/releases
- Run it, let it sync to the network (may take a few hours). You can let it sync while you set up your Linux VM
- After it has finally synced, create a new account. Note the unique code for later. We will tell our miner to put all mined ether into that wallet.


Create a Linux VM in Azure
- Create a new Ubuntu linux VM. You will want to pick a VM size with at least at least 2 cores (otherwise all your time will be spent importing blocks instead of mining).

- To make it easy to connect via SSH later, give your VM a friendly hostname

Connect / Install helpful tools (optional)
Configure a 2nd hard drive
The Ubuntu image creates a VM with a 30GB hard disk. The issue with this, is that the Ethereum blockchain itself is over 30GB and so the disk will run out of space before you sync. You need to attach a 2nd hard drive, configure the system to move /home to the 2nd disk.
Simplified from https://azure.microsoft.com/en-us/documentation/articles/virtual-machines-linux-how-to-attach-disk/
- In the portal attach a new disk. The name is unimportant. Make it at least 200GB. You will only be charged blob storage for the space you fill up.

-
You can list your drives. You will see /dev/sdc as not having valid partitions (as we haven't set them up yet)
sudo fdisk -l
- run fdisk on sdc. You can just accept the defaults by pressing Enter
sudo fdisk /dev/sdc
 n (new)
 Primary (Accept Defaults)
 1 (Accept Defaults)
 First Sector (Accept Defaults)
 Last Sector (Accept Defaults)
 w (to close and apply)
- Format the new partition
sudo mkfs -t ext4 /dev/sdc1
- this will now show our new drive is partitioned and ready to use!
sudo fdisk -l
- Temporarily mount it to /datadrive
sudo mkdir /datadrive
sudo mount /dev/sdc1 /datadrive
- Get the UUID (can copy in putty simply by selecting text with mouse. Auto copies to clipboard)
sudo -i blkid

- Add it to the filesystem so that it is always mounted at startup
sudo nano /etc/fstab
add in your disk in the below format
UUID=???????? /datadrive ext4 defaults 0 2
e.g. UUID=385ae56e-cc0d-4d6a-9130-70458e7c57b7 /datadrive ext4 defaults 0 2
Ctrl+x to quit. Y to save

- Try unmounting and remounting to confirm it is all okay
sudo umount /datadrive
 sudo mount /datadrive
- Make the drive writeable
sudo chmod go+w /datadrive
- Can confirm that your /datadrive is as large as you made it earlier. Should be /datadrive
sudo df -H

- I would reboot now to make sure the system comes back up and you haven’t broken anything. Better to do now with a fresh machine than later
sudo reboot
Move /home to 2nd drive
Simplified from https://help.ubuntu.com/community/Partitioning/Home/Moving
Install and run Geth!!
Finally the reason we are here. You can easily install by adding in the repository into apt-get and installing from there
Simplified from https://github.com/ethereum/go-ethereum/wiki/Installation-Instructions-for-Ubuntu
- Install geth
sudo apt-get install software-properties-common
sudo add-apt-repository -y ppa:ethereum/ethereum
sudo add-apt-repository -y ppa:ethereum/ethereum-dev
sudo apt-get update
sudo apt-get install ethereum
- Run geth. Replace the ether address with your wallet
I prefer to run geth via screen. That way if putty disconnects it will still continue to run on the server.
screen -S gethminer geth --etherbase '0x461da8f20aa94fac22d7b134afac5481315d7dae' --mine 2>> geth.log
- Tip: If putty disconnects, you can reconnect by using
screen -r -S gethminer
Here is a screenshot of me running 2 instances of Putty. One with htop showing the 8 core machine at 100% utilisation, and a 2nd instance showing geth processing blocks.


